I missed most of Sharon’s videos the first time around this week. My weekend got unexpectedly busy as our daughter made an unexpected visit for the weekend. She wanted to do “fall activities” so we spent Saturday afternoon at a local pumpkin farm. It had the most challenging corn maze that I’ve ever been in. We (or I) were set to walk through the stalks when my husband finally saw several of the buildings through the stalks and we managed to find the exit. We came home with hand picked pumpkins and sunflowers and my daughter had a relaxing, fun day away from the stresses of the city. Then I watched the Bills this morning…
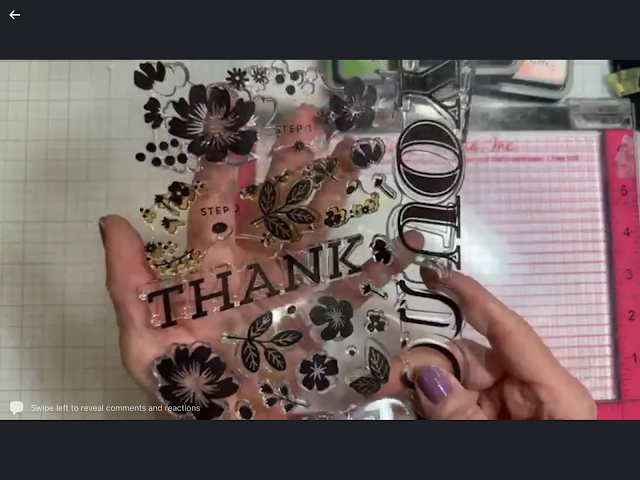
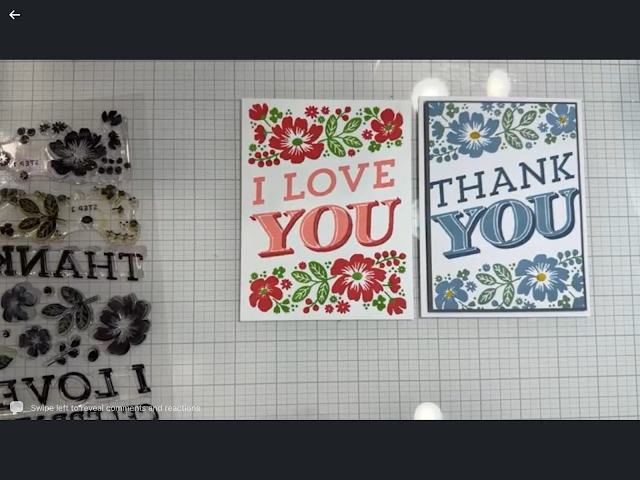
Let’s see what Sharon shared. On Wednesday night Sharon highlighted two different stamp sets with matching die sets, first one from Concord & 9th. This first set has several layered components and Sharon shared she did the same card first with Catherine Pooler then with IO and in the photos below with Distressed Oxides. She found the coverage for solid images was the best with the Catherine Pooler and the oxides.
The word stamps came in two parts, an outline and the word itself. Sharon did the solid words in lighter colors and the outlines in a darker color.
The photos that appear sideways are because Sharon had to bring the Misti closer so she could position the stamps as accurately as possible due to the layers.
Sharon had a completed card in shades of blue from Catherine Pooler inks.
The Thank You card was her IO card.
Another alternative to stamping your sentiment is to die cut the letters. You can even do both and pop the die cut to create dimension.
Cut out alternative colors for your words or flowers.
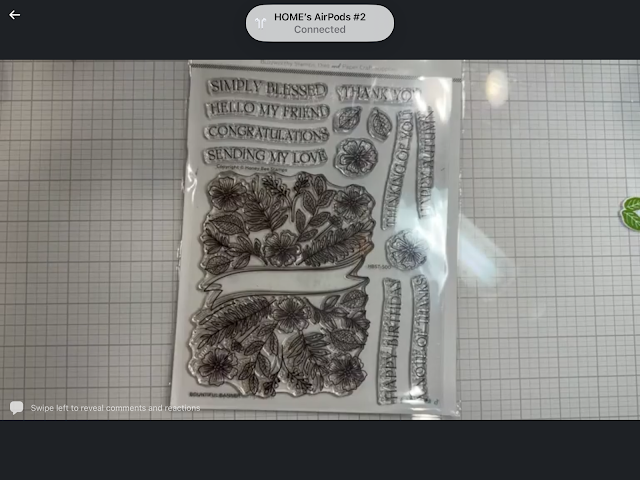
Next up Sharon did a demo using a stamp and matching die set from Honey Bee. This set also comes with an ‘empress’ plate for the BetterPress.
This is the empress plate that goes with this stamp set.
On Saturday Sharon demoed her BetterPress machine and how easy it is to use along with a few alternatives to the basic supplies. Below we're starting with a Glimmer Foil machine. If I've got the process right you start by placing your plate design up on the Glimmer machine and turn on. There are three lights, the red that tells you your machine is on, the first green that your machine is heating up, and the second green flashing light - this light flashes as it heats and when your machine is ready it will go solid.
Lay your foil with the colored/shiny side DOWN on top of your plate.
Lay your paper over your foil and your plates over your paper. When the second green light goes solid remove the tray by the handle at the bottom and run it through your Big Shot or whatever die cut machine you have. (Below you will see a sample Sharon made with a BetterPress plate.)
Next is the BetterPress machine. These machines are NOT the same nor are they interchangeable. This is the BetterPress plate Sharon used in her demo.
Your BetterPress machine comes with two pieces. The base that is magnetic and where you place your BP plate with the textured side UP. The other piece is a clear plate with tick marks for both A2 and A7 card sizes. The plate also has magnets in the corners (those round impressions you see in the photo below).
There is no heating involved in this process. You place your plate, face up on the base. The magnet will hold it in place and the tick marks let you position the plate where you want it.
Next, ink your plate. Archival ink works well and there are other inks that work. Part of the fun is figuring what is best for your needs.
On the reverse side of the top plate, adhere your paper with a piece or two of removable tape. Then turn the plate over with the paper on the bottom and lining up the magnets in the corner place the plate on top of the bottom plate. NOTE: the two plates will not touch!
Run the sandwiched plates through your die cut machine. Here Sharon is using her Big Shot. The pressure of the machine will squeeze the two plates together and press the inked plate into your paper.
Voila! The photo doesn't show the impression in the paper and depending on the paper you use you can get a deeper impression with your ink. Also, your ink will determine how you can color your image. The ink that is intended for the BetterPress is not compatible with Copics. Sharon said she might color the impression below with colored pencils. Watercolor paper makes a beautiful impression and you can color your image with watercolors.
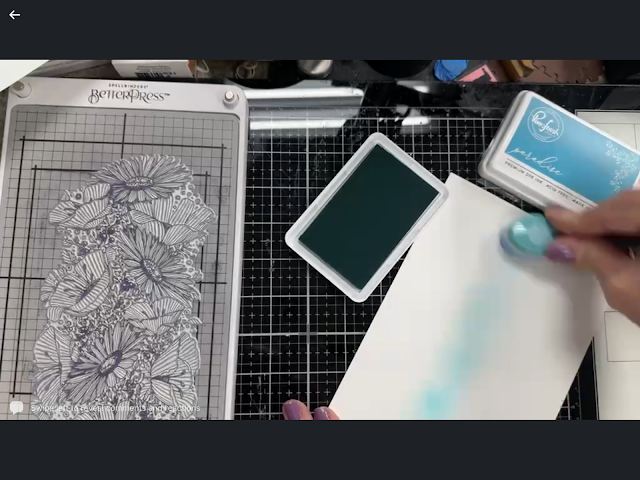
Sharon did another sheet using these new colors from Pink Fresh as part of her background,
She wasn't entirely happy with how this came out BUT, she suggested she might fussy cut the right edge. We'll see in a future video.
Here are the three samples Sharon did. You can use BetterPress plates with your Glimmer machine but you CANNOT use foiling plates in your BetterPress. I'm pretty sure I've got that right. Double check with Sharon when you buy your plates at the store.

Lastly, Sharon had a few new products to share and some class and store samples. First is this class from Penny Black. It's a continuation of the Postage Stamp/Die class. This is the Winter Postage Stamp/Die class.
We have some great Bills papers and accents. The football player in the card on the left is currently out of stock but an order is in and we expect more to come in shortly. The helmet die is one of our store owned dies that fits in our commercial sized machine. We don't sell the die but we do sell already cut helmets. We also have our buffalo dies and Bills papers.
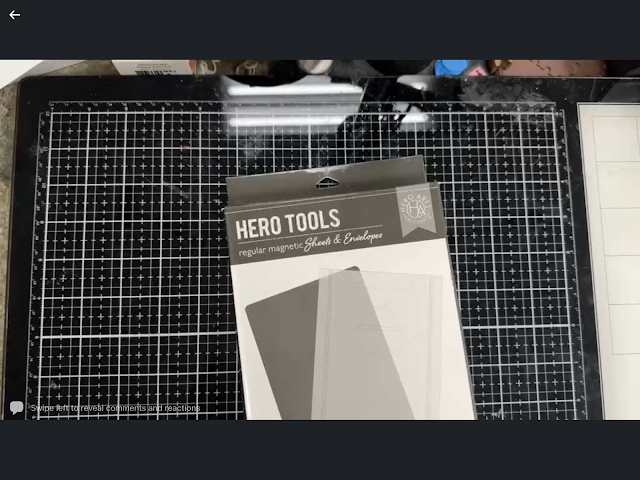
New Hero Tools: Hero has their own magnetic sheets and pockets. The plastic envelopes are a heavier weight than some of the other plastic pockets we carry. The size of the sheet and the pocket fits most of our dies and die sets.
Sharon used these new colors from PinkFresh in her BetterPress sample. We do not carry the full size Pink
Fresh inks but we do carry the ink cubes.
PinkFresh mini cubes come in packs of four with the colors along the same spectrum. Here is a sample of all the new sets we've gotten in.
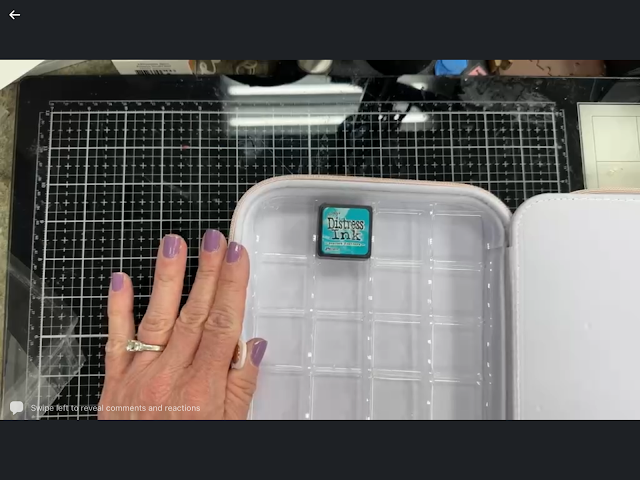
In addition to the ink cubes we have PinkFresh's new holders for the mini cubes. We have them in two sizes. One holds 36 cubes the larger size holds 72.
The holders also fit other companies mini cubes. We tested using Distress cubes.
It was a little hard to get a good image but these holders are very lush and remind me of leather jewelry holders in their design. They are elegantly packaged and the smaller set is $39 and the larger set is $59.
In a follow-up to a previous post. We have the stitchable dies from Spellbinders. Remember, you don't have to stitch these, you can use them just as they are.
We've gotten in more individual pieces of the Simon Hurley's snow globe die cut collection and limited bundles that include all four collections,
For not having a lot to share in terms of new product this was a pretty long post! Dates for Stamp Camp are up, call the store to reserve your date and spot. We have some great classes, check out the 'Classes' tab on the website. Hopefully the Bills will have a better week next week. Personally, I think they should have gone over right after last week's game. They looked flat during Sunday's game like they were tired or still had some jet lag. Oh, well there's always next week. Here's my funny for the day. If you're older like me you'll get it.
The cooler weather is here so it's a great time to get crafty. Stay warm, enjoy those pumpkin spice lattes and most of all Stay Safe everyone.












No comments:
Post a Comment